Studio Monitor Placement: You Can't Mix What You Can't Hear
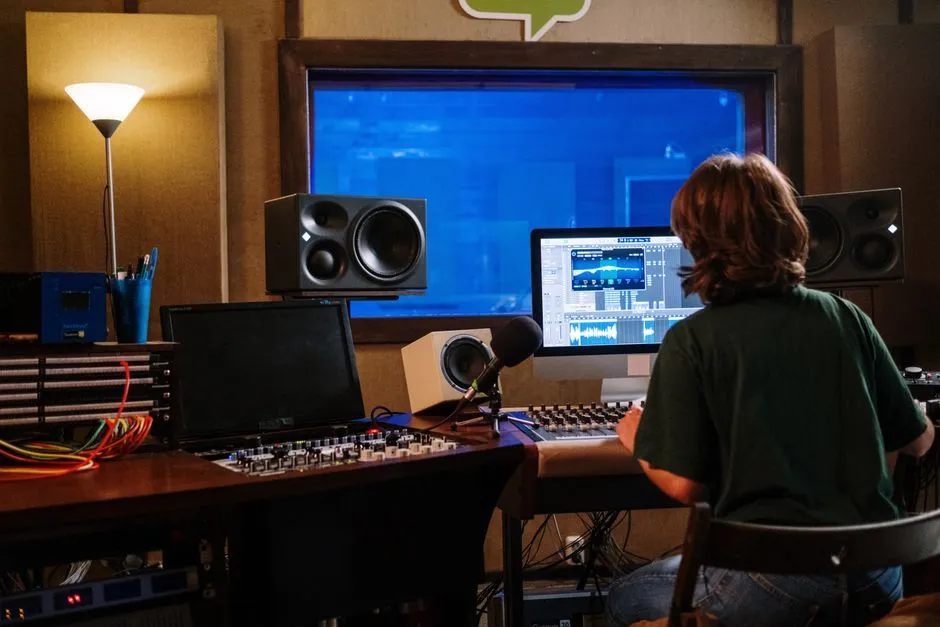
- Placement Is Free, and It Beats a Monitor Upgrade
- The Equilateral Triangle: Your Starting Point
- Height and Angle: Tweeters at Ear Level
- Walls: The Front Wall Matters Most
- Which Way Should You Face?
- Symmetry: The Non-Negotiable
- Desks, Stands, and Decoupling
- How Loud? Your Ears Lie at Both Extremes
- Test It: Trust Measurements of Your Ears
- What Placement Can't Fix
- The Takeaway
Placement Is Free, and It Beats a Monitor Upgrade
Here's the uncomfortable truth about studio monitors: where you put them changes what you hear more than which ones you bought. A pair of modest monitors set up correctly in a sensible spot will tell you more truth about your mix than expensive ones shoved against a wall on a cluttered desk.
That matters because mixing is a feedback loop. You make a decision, you listen, you adjust. If what reaches your ears is distorted by bad placement — bass bloated by a nearby wall, stereo image skewed by an asymmetric setup — every decision you make is compensating for a problem that doesn't exist in the actual audio file. Your mix ends up "correcting" for your room, and it falls apart everywhere else.
So before you spend anything, spend an afternoon on placement. Everything in this guide costs nothing except the isolation pads, and even those are optional at first.
The Equilateral Triangle: Your Starting Point
The standard reference layout is simple: your two monitors and your head form an equilateral triangle. If the monitors are 1.2 meters apart (measured tweeter to tweeter), your head should be about 1.2 meters from each one — some engineers sit slightly inside the triangle, just ahead of its tip, which is fine.
Why a triangle? Stereo imaging — your ability to hear where sounds sit between the speakers — depends on both monitors being the same distance from your ears and hitting them at matched angles. Get that right and the "phantom center" (the illusion of sound coming from between the speakers, where you place lead vocals and kick drums) snaps into focus. Get it wrong and the center smears, and you'll never be sure whether your vocal is actually centered or just sounds that way from your chair.
Practical steps:
- Measure the distance between tweeters with a tape measure. Guessing isn't good enough — errors of a few centimeters are audible in the imaging.
- Set your listening distance to match. For typical small nearfield monitors (monitors designed to be listened to from about one to two meters away), 1 to 1.5 meters between speakers works well. Spreading small monitors much wider than that opens a hole in the middle of the image.
- Angle each monitor inward — this is called toe-in — so each one points at your head, or just behind it. Most people aim them to cross a few centimeters behind their ears. If the image feels too narrow, reduce the toe-in slightly; if the center feels vague, increase it.
None of this requires equipment. It requires a tape measure and ten minutes.
Height and Angle: Tweeters at Ear Level
High frequencies are directional: they beam forward in a fairly narrow cone, while low frequencies spread everywhere. That means your vertical position relative to the tweeter (the small driver that reproduces treble) changes how much high end you hear. Sit below the tweeter axis and the mix sounds dull, so you brighten it — and it ends up harsh everywhere else.
The rule: tweeters at ear height when you're seated in your normal mixing position. Sit in your actual chair, at your actual working posture, and check.
If your monitors sit on a desk and the tweeters end up below your ears, you have three fixes, in ascending order of preference:
- Tilt the monitors upward so the tweeter axis points at your ears. Angled foam isolation pads do this cheaply. It works, but steep tilt aims the speaker at the ceiling past your head.
- Raise them on stable platforms or isolation stands until the tweeters reach ear height.
- Use dedicated monitor stands positioned behind or beside the desk, which solves the height problem and the desk-reflection problem (more on that below) at once.
Avoid the common failure mode: monitors flat on a desk, tweeters at collarbone height, pointing straight ahead over your shoulders. You'll hear mostly off-axis sound, which is not what the monitor was designed to deliver.
One more orientation note: if your monitors were designed to stand vertically — woofer below tweeter, which is most of them — keep them vertical. Laying vertical monitors on their sides changes how the two drivers' outputs combine at your ears and usually makes the sweet spot smaller and lumpier. Horizontal placement is fine only for monitors actually designed for it.
Walls: The Front Wall Matters Most
Every wall near a monitor reflects sound. The reflection that causes the most trouble comes from the wall behind the monitors — the front wall, in studio terminology (walls are named from the listener's perspective, so the wall you face is the "front").
Here's the mechanism, because understanding it helps you fix it. Low frequencies radiate backward from a monitor as well as forward. That rearward energy bounces off the front wall and arrives at your ears slightly later than the direct sound. At some frequencies the reflection reinforces the direct sound; at others it partially cancels it. The result is a dip-and-bump pattern in the bass response that depends entirely on the distance between the monitor and the wall. Engineers call this speaker-boundary interference, and it's why the same monitor can sound boomy in one spot and thin in another.
You can't eliminate it in a normal room, but you can manage it:
- Avoid the mid-distance trap. Monitors roughly half a meter to a meter from the front wall tend to put the deepest cancellation right in the musically important bass range. Either get close to the wall (which pushes the cancellation higher in frequency, where it's shallower and easier to treat) or get well away from it (which pushes it lower). In small rooms, closer is usually the practical answer — many monitors even include a switch to reduce bass output when placed near a wall, for exactly this reason. Check your monitor's manual; those rear-panel switches exist to be used.
- Stay out of corners. A corner loads a monitor with two boundaries at once, exaggerating bass unpredictably. If a corner placement is unavoidable, expect to rely heavily on the monitor's boundary compensation switches and on careful listening checks.
- Don't make the distances match. If your monitor ends up the same distance from the front wall as from the side wall, both boundaries cancel at the same frequencies and the dip gets deeper. Unequal distances spread the damage thinner.
Which Way Should You Face?
Conventional wisdom says fire the monitors down the long dimension of the room — you facing the short wall, sound traveling the room's length. This puts the rear-wall reflection (the one behind your head) farther away and weaker by the time it returns. In most rectangular rooms it's the right call.
It's not an absolute. Some rooms have doors, windows, or closets that force a compromise, and a symmetric setup along the "wrong" wall beats an asymmetric setup along the "right" one. Symmetry wins that fight every time — more below.
For your seating position front to back: avoid the exact center of the room's length. Room modes — the resonances a room imposes on bass, which we cover properly in the guide to room acoustics and cheap treatment that actually works — create the most uneven bass at the halfway point. A widely used guideline puts the listening position around 38% of the room's length from the front wall. Treat that as a starting point for experimentation, not a law of physics; the "right" spot is the one where bass sounds most even when you play material you know well. Moving your chair 30 centimeters can change the bass you hear more than an EQ plugin ever will.
Symmetry: The Non-Negotiable
Everything else in this guide has tolerances. This one doesn't: the left and right sides of your setup must mirror each other.
If your left monitor sits near a wall and your right monitor faces open room, the two speakers get different boundary reinforcement — the left one will sound bassier — and the reflections arriving at each ear differ. Your stereo image tilts, and you'll unconsciously pan and balance the mix to compensate. That skew is baked into every decision you make.
Checklist:
- Both monitors the same distance from their respective side walls.
- Both the same distance from the front wall.
- You seated on the room's centerline (left-right), not shoved to one side.
- Large objects — bookcases, sofas, gear racks — roughly balanced between the two sides, or at least not hard against one monitor's side of the room.
If your room forces a choice between symmetry and any other guideline in this article, choose symmetry.
Desks, Stands, and Decoupling
Two problems live on your desk. First, the desk surface itself reflects sound: treble and midrange bounce off it and arrive at your ears a moment after the direct sound, smearing detail and adding a comb-like coloration. Second, monitors sitting directly on the desk transmit vibration into it, turning the desktop into a large, uncontrolled bass radiator.
Fixes, cheapest first:
- Push monitors to the back edge of the desk and tilt them up, shrinking the reflective surface between speaker and ear.
- Add isolation pads — dense foam or rubber platforms that decouple the cabinet from the desk. They're inexpensive and address the vibration problem directly.
- Best: stands behind the desk, which remove both the reflection path and the vibration coupling entirely, and make correct height trivial.
Also clear the space between the monitors and your ears. A big monitor screen directly between the speakers, jars of pens, a lamp — anything in the path reflects and diffracts sound. Push the display back or drop it lower if you can.
How Loud? Your Ears Lie at Both Extremes
Human hearing isn't flat. At low listening levels we hear less bass and treble relative to the midrange; crank it up and bass and treble seem to bloom. This is the equal-loudness effect, and it means the same mix sounds thin quiet and exciting loud — with zero changes to the audio.
The practical consequences:
- Do most of your mixing at a moderate, conversational-plus level — a level you could hold a slightly raised conversation over. Check loud briefly, check quiet briefly, but live in the middle.
- Pick a consistent level and return to it. Consistency matters more than the exact number, because your judgment calibrates to a level you use every day.
- Protect your hearing. Sustained loud monitoring across hours-long sessions genuinely damages hearing over time, and hearing damage is permanent — it is the one piece of studio equipment you cannot replace. Occupational safety guidance treats extended exposure above roughly 85 dB as risky; a home mixing session has no reason to live up there. If your ears ring or feel fatigued after a session, you were too loud.
Moderate level isn't just safe — it's more accurate. Loud monitoring flatters everything and hides balance mistakes.
Test It: Trust Measurements of Your Ears
You've placed the monitors. Now verify, using material and checks that cost nothing:
- Play three or four commercial tracks you know deeply — songs you've heard on many systems for years. Not your own mixes; you need an absolute reference.
- Check the phantom center. A lead vocal panned center should sit in a stable, narrow spot exactly between the monitors. If it's wide, vague, or off to one side, re-measure your triangle and your symmetry.
- Walk the bass. Play a bassline you know and slowly move your head forward and back, then side to side. Some variation is normal in any untreated room; dramatic dropouts at your mixing chair mean the chair or the monitors need to move.
- Sit down and stand up. If the mix changes drastically between the two, your tweeter height or tilt is off.
A quick reference for the whole setup:
| Parameter | Target | Why it matters |
|---|---|---|
| Monitor spacing | 1–1.5 m apart for small nearfields | Wider opens a hole in the center image |
| Listening distance | Equal to spacing (equilateral triangle) | Stable stereo imaging |
| Toe-in | Aimed at or just behind your head | Focuses the phantom center |
| Tweeter height | At seated ear level | Treble is directional; off-axis sounds dull |
| Front wall distance | Close (with boundary switch) or well clear; avoid ~0.5–1 m | Mid distances cancel musically important bass |
| Left/right symmetry | Mirror-image distances and surroundings | Asymmetry skews the stereo image and bass |
| Listening position | ~38% of room length; never dead center | Center of the room has the most uneven bass |
| Coupling | Isolation pads or stands, not bare desk | Desk vibration and reflections smear the sound |
| Level | Moderate and consistent | Equal-loudness effect distorts judgment at extremes |
What Placement Can't Fix
Honesty time. Placement optimizes how your monitors interact with the room; it doesn't change the room. An untreated bedroom still has strong reflections and uneven bass no matter how perfect your triangle is. Placement gets you a surprisingly long way — much further than most people expect — but the next real improvement comes from absorption at the reflection points and bass control, not from new monitors.
Room correction software deserves a similar honest note. Measurement-based correction can tame some frequency-response problems at the listening position, and opinions among experienced engineers genuinely vary on how much to lean on it. What's not in dispute: it cannot fix reflections arriving from the wrong directions, it can't widen a sweet spot, and it works far better as a final polish on a well-placed, reasonably treated setup than as a rescue for a bad one. Fix placement first, treatment second, then decide if correction adds anything.
And if your room is genuinely hostile — a tiny square bedroom, a shared space where nothing can go on the walls — it's worth honestly weighing whether headphones or monitors should carry your mixing decisions. A good pair of headphones bypasses the room entirely, and plenty of respectable work gets done that way. The strongest setups use both: monitors for balance and imaging, headphones for detail and cross-checking.
The Takeaway
Measure an equilateral triangle, put the tweeters at ear height, mirror the left and right sides, keep the monitors out of the mid-distance dead zone near the front wall, and mix at a moderate, repeatable level — every one of those moves is free, and together they're worth more than any monitor upgrade you're considering.